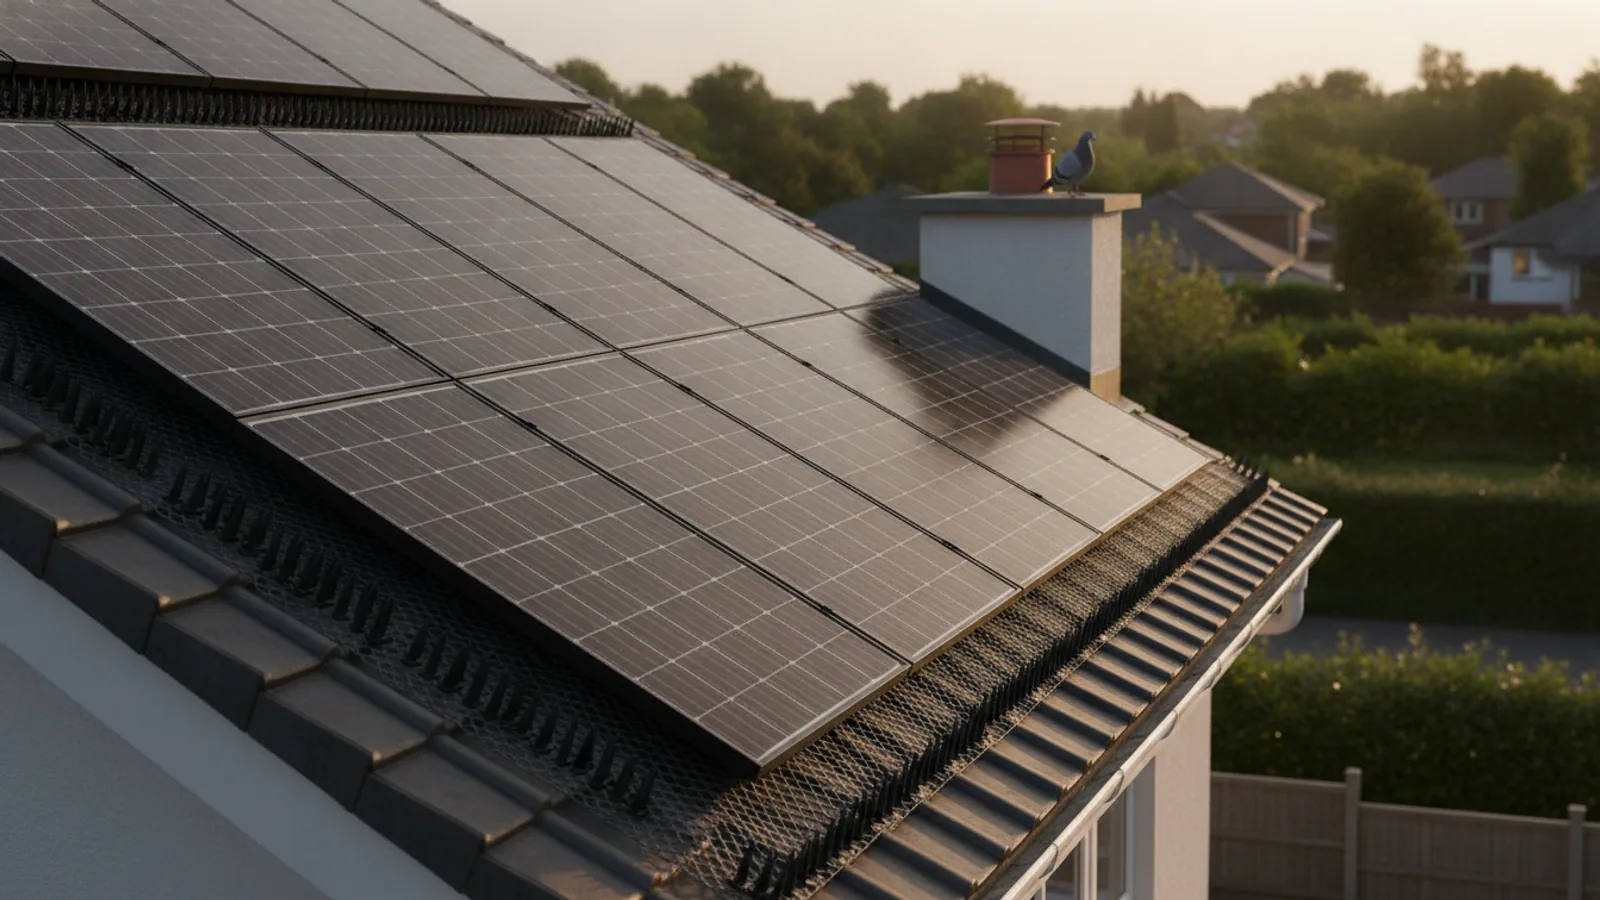
Solar Panel Bird Proofing Guide
This guide explains how to approach solar panel bird proofing guide, including the preparation, practical steps, common mistakes, and final checks that help you finish with confidence.
Before You Start
Step-by-Step Instructions
Quick Reference
Common Problems When You Solar Panel Bird Proofing Guide
Even with careful planning, you might encounter a few snags when bird proofing your solar panels. Knowing what to look out for can help you fix issues quickly and effectively.
Gaps or Loose Sections in the Mesh
This is the most common problem. If birds are still seen attempting to get under or around your panels after installation, it usually means there's a small gap or a section of mesh isn't fully secured. Strong winds can also loosen clips over time.
- Fix: Re-inspect the entire perimeter, paying close attention to corners and where mesh sections join. Add more non-piercing clips, ensuring they are tightly fastened to the panel frame. If a section is too short, you may need to add an overlap piece and secure it well with clips or cable ties.
Damage to Panels or Wiring During Installation
Accidental scratches on panels, snapping of delicate wires, or dislodging tiles can occur if you're not careful on the roof. This is why careful planning and a steady hand are essential.
- Fix: Always move slowly and deliberately on the roof. Avoid placing tools directly on panel surfaces. If you suspect damage, consult your solar panel installer or a qualified electrician for inspection and repair. Prevention is key here; use protective mats if you need to kneel on tiles.
Difficulty Reaching All Areas
Some solar panel arrays are installed in awkward positions, making it hard to reach all edges, especially on multi-level roofs or over conservatories.
- Fix: If you find yourself struggling to reach an area safely, stop. This is a clear sign that professional help is needed. Specialist installers have the equipment and training to access difficult areas safely. Do not take unnecessary risks.
Birds Trapped Under Panels
In rare cases, if you install the mesh while birds are still under the panels (especially during nesting season), you might inadvertently trap them.
- Fix: Before fully sealing all sides, conduct a final check to ensure no birds are trapped. If you find a trapped bird, carefully open a section of the mesh and allow it to escape naturally. Ensure the area is clear before re-securing the mesh. This is why cleaning out nests before installation is vital.
Mesh Sagging or Warping Over Time
If the mesh isn't taut enough or is made from lower-quality material, it can sag or warp, especially with temperature changes or strong winds. This can create new entry points.
- Fix: Use a high-quality, durable mesh (like galvanised steel or robust PVC). Ensure you use enough clips to keep the mesh taut every 50-100cm. If sagging occurs, add more clips to tighten the section.
Advanced Tips for Solar Panel Bird Proofing Guide
Beyond the basic installation, these tips can help ensure long-lasting protection and peace of mind for your solar panel system.
Conduct Annual Inspections
Make it a habit to visually inspect your bird proofing at least once a year. This can be done during your annual solar panel cleaning or other home maintenance checks. Look for any signs of wear, tear, or damage to the mesh, and check that all clips are still firmly in place. Early detection of any issues can prevent birds from re-establishing themselves.
Combine with Minor Visual Deterrents (with caution)
While physical barriers are the most effective, you might consider very minor visual deterrents for very persistent birds. Reflective tape or small, imitation predatory birds can sometimes scare birds away initially. However, these are rarely a long-term solution and should only be used as a supplementary measure AFTER a robust physical mesh barrier is in place. Never rely solely on visual deterrents.
Consider Professional Installation for Complex Arrays
If you have a very large solar array, panels on multiple roof sections, or a particularly steep/high roof, consider having your bird proofing professionally installed. Specialists have the right equipment, experience, and safety protocols to ensure a perfect, durable installation without risk to yourself or your property. This can be a worthwhile investment for peace of mind and warranty protection.
Plan for Future Maintenance Access
While the goal is to keep birds out, you might occasionally need to access the underside of your panels for cleaning, repairs, or inspections. When installing, think about how sections of the mesh could be temporarily removed and re-secured if necessary. Some bird proofing systems offer modular sections or easily detachable clips for this purpose. This forethought saves time and effort in the long run.
Protect Inverter and Wiring
Beyond the panels, ensure that your inverter and any exposed wiring are also protected from bird damage. Sometimes birds can perch on these components and their droppings can cause corrosion or short circuits. While mesh under panels addresses the primary nesting problem, a quick check of other components is always wise.
Solar Panel Bird Proofing Guide FAQ
Why do birds nest under solar panels?
Birds, especially pigeons and starlings, are attracted to the sheltered, warm, and secure space under solar panels. It offers an ideal nesting site, protected from predators and the elements.
What kind of damage can birds cause to solar panels?
Bird droppings are acidic and can corrode wiring, metal frames, and even the panel surface over time. Nests can block airflow, leading to reduced panel efficiency and potential overheating. Additionally, birds can damage wiring by pecking at it, leading to electrical faults. The noise and mess can also be a nuisance.
Is bird proofing humane?
Yes, solar panel bird proofing, particularly using mesh barriers, is considered a humane method. It simply prevents birds from accessing the space under the panels without causing them any harm. It's a deterrent, not a pest control measure that harms the animals.
Will bird proofing affect my solar panel warranty?
Most reputable bird proofing kits use non-piercing clips that attach to the panel frame without drilling or modifying the panels themselves. If installed correctly using these methods, it should not void your solar panel warranty. However, it's always best to check your specific warranty terms or consult your solar panel installer if you have concerns.
How long does solar panel bird proofing last?
When installed correctly using high-quality materials (like galvanised steel or durable, UV-resistant PVC mesh and clips), solar panel bird proofing can last for 10 to 20 years. Regular inspections can help extend its lifespan by addressing any minor wear and tear promptly.
Can I clean the bird proofing mesh?
Yes, you can clean the bird proofing mesh. A gentle rinse with a hose to remove dust and debris is usually sufficient. For more stubborn dirt, a soft brush and mild soapy water can be used. Ensure you don't dislodge the mesh or clips during cleaning.
Does bird proofing reduce solar panel efficiency?
No, correctly installed bird proofing mesh around the perimeter of the panels should not reduce their efficiency. In fact, by preventing nests and droppings from accumulating, it helps maintain optimal airflow and cleanliness, potentially preserving or even improving your panels' efficiency over time.
Final Checklist for Solar Panel Bird Proofing Guide
Before you consider your solar panel bird proofing project complete, run through this final checklist to ensure everything is covered and your home is protected.
- Safety First: All safety gear (gloves, eye protection, non-slip footwear, harness if applicable) was used during installation.
- Roof Cleaned: The area under and around the solar panels was thoroughly cleaned of nests, droppings, and debris before installation.
- Mesh Cut Correctly: Mesh sections were accurately measured and cut to fit each side of the solar panel array.
- All Gaps Sealed: The bird proofing mesh forms a continuous barrier around the entire perimeter of the panels, with no gaps or potential entry points.
- Clips Secure: All non-piercing clips are firmly attached to the panel frame, holding the mesh taut and secure.
- Overlaps Tight: Mesh overlaps at corners and joins are sufficient and tightly secured.
- No Sharp Edges: Any excess mesh has been trimmed, and no sharp edges are left exposed.
- Final Inspection: A thorough visual inspection from multiple angles has been conducted to confirm the quality of the installation.
- Tools Stored: All tools and equipment have been safely removed from the roof and stored away.
- Monitoring Plan: A plan for post-installation monitoring and annual checks of the bird proofing is in place.


